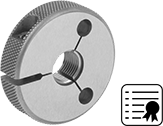
Threaded Ring Gauges with Calibration Certificate

Not only were these gauges calibrated in a lab, but they also come with a certificate that's traceable to NIST. The certificate, sometimes called a test report and long form certificate, details the tested measurements. They’re for checking a part’s external threads to ensure they fall within tolerance.
A part is within tolerance if it’s easy to thread a go gauge onto the part but difficult to thread a no-go gauge more than two turns. Inspect faster by holding more than one ring gauge with a threaded ring gauge holder.
Go gauges check the maximum external thread size.
No-go gauges check the minimum external thread size.
Threads have different classes of fit. Thread fit designates the tightness or looseness of the mating threads. For example, inch threads with a 3A fit have tighter tolerances than threads with a 2A fit.
For technical drawings and 3-D models, click on a part number.
| Thread Size | Thread Type | Thread Direction | Hardness | Material | Pitch Dia. Tolerance | Each | |
Go Gauge | |||||||
|---|---|---|---|---|---|---|---|
For Thread Fit Class 2A | |||||||
| 10-32 | UNF | Right Hand | Rockwell C60 | Tool Steel | -0.0003" to 0" | 00000000 | 0000000 |
For Thread Fit Class 3A | |||||||
| 10-32 | UNF | Right Hand | Rockwell C60 | Tool Steel | -0.0003" to 0" | 00000000 | 000000 |
No-Go Gauge | |||||||
For Thread Fit Class 2A | |||||||
| 10-32 | UNF | Right Hand | Rockwell C60 | Tool Steel | 0" to 0.0003" | 00000000 | 000000 |
For Thread Fit Class 3A | |||||||
| 10-32 | UNF | Right Hand | Rockwell C60 | Tool Steel | 0" to 0.0003" | 00000000 | 000000 |
Threaded Ring Gauges

Check a part’s external threads to make sure they fall within tolerance. You can use these for bolts, threaded rods, bits, and more. All gauges come with a manufacturer’s certificate of accuracy, also known as a certificate of compliance or a short form certification, that verifies the thread sizes are within tolerance.
The part is within tolerance if it’s easy to thread a go gauge onto, but difficult to thread a no-go gauge more than two turns. Use a threaded ring gauge holder to keep two gauges on hand at once for faster inspection.
Go gauges check the maximum external thread size.
Threads have different classes of fit. Thread fit designates the tightness or looseness of the mating threads. For example, inch threads with a 3A fit have tighter tolerances than threads with a 2A fit.
For technical drawings and 3-D models, click on a part number.


